Showing posts with label Scor-Pal. Show all posts

Wednesday, June 02, 2021

Impression Obsession - Old is New

With such a huge collection of wonderful stamps from so many artists, sometimes the older stamps in the Impression Obsession catalog find their way out of the spotlight. We don't want them to be forgotten, so we like to feature them regularly. We hope you're inspired! 
I filled this week's tutorial slot with an updated video for the Hanging Treat Box tutorial - this was a project from 2008 that has gone without a video all this time! I added a variation for using the full sheet of cardstock to create an extension on the back for taller bottles like this one, so be sure to check that out.
The focal panel on my little box pocket was just the right size for a llama, so I brought him out for some love. I did a little wet-into-wet watercoloring for the background, then stenciled over top with my favorite cloud stencil, adding highlights with a battery eraser. The llama is watercolored as well.

What would you tuck inside the box?
IO Products:
(also available in a clear set: MC715 Llama Love)
Be sure to check out the other designers' blogs for inspiration - see the I.O. blog for all the details!

Thanks for stopping by!


Ideas, Supplies, Machines, Paper & More

Sunday, January 12, 2020

Spellbinders January 2020 Large Die Kit

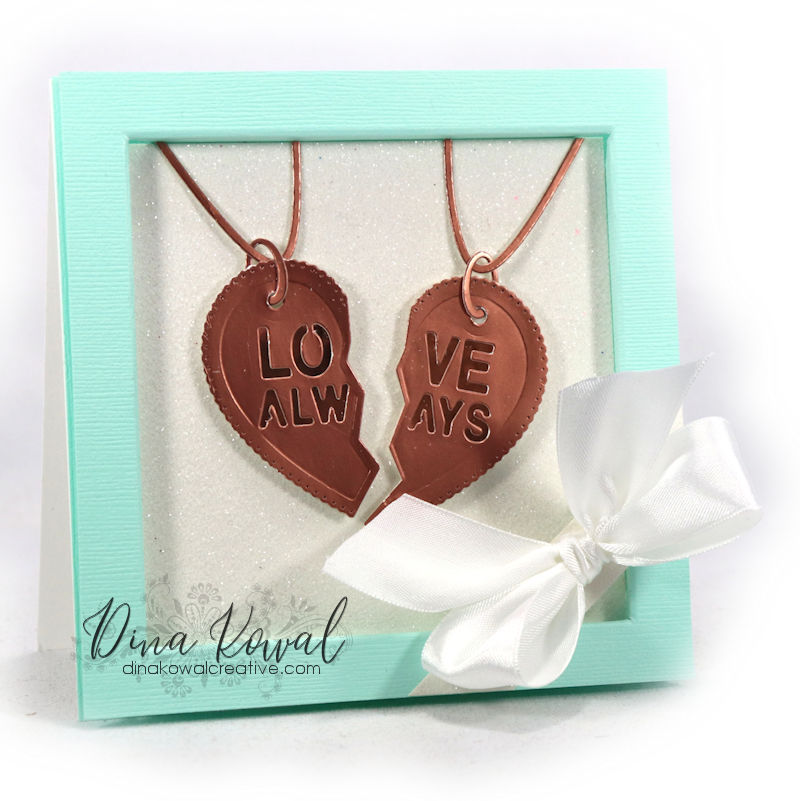
This month's Spellbinders kits are beautiful ones for Valentines Day - the Large Die Kit has several options with these friendship necklace style dies! I wanted to make my card look like a Tiffany box, and I'm pretty happy with how it turned out. I love the dimension! 


I cut two metallic cardstock layers for each pendant piece, one with the lettered inserts and one without. On the plain pieces I used a dark marker to color the center, just adding a little contrast so the letters would show up better.


I scored my 5" square panel at 1/2" and 3/4" from each side to create a double frame (I actually meant for the outside of the frame to be at 3/4" - didn't think that through all the way - but this works fine too).


Cut from corner to corner, and then fold back on the 1/2" line and in on the 3/4" line. That creates a recessed frame.


Glue just on the triangle sections, and tuck in a 4" square of glitter paper into the frame - this will hold everything in place. 


I assembled the pendants and attached them with foam tape, then tucked in the 'chain' pieces and trimmed them at the edge of the frame.


Glue the frame piece to a 5" card base to finish... the card front has a 1/4" thickness, so just note that it would need to be tucked in a package rather than sent in an envelope.


I added a little glitter cardstock 'bridge' on the corner of the front so I could move the bow in away from the edge. That's it! A Tiffany Box card. 

Here's the full kit and a little information about the club kits, in case you're interested in subscribing - I love getting these each month! (Note - the insert pieces cut out the holes and letters, so the broken heart pieces are plain, and could be used without the jewelry findings to make a sympathy card or another embellishment.)


leaf-icon.png Past Club Kits at Member Rates
leaf-icon.png 10% Store Savings
leaf-icon.png Members Only Offers & Deals
leaf-icon.png Earn Creative Rewards for Each Purchase
leaf-icon.png Monthly Inspiration
leaf-icon.png Cancel Anytime
leaf-icon.png Skip Any Month
leaf-icon.png Annual Membership Gift
leaf-icon.png Exclusive Deals 


Thanks for stopping by!


Ideas, Supplies, Machines, Paper & More

Thursday, December 19, 2019

Impression Obsession DT Challenge: Quick and Easy

The Impression Obsession team's challenge today is to create a quick project - with less than a week until Christmas, you might need a last minute card or gift!

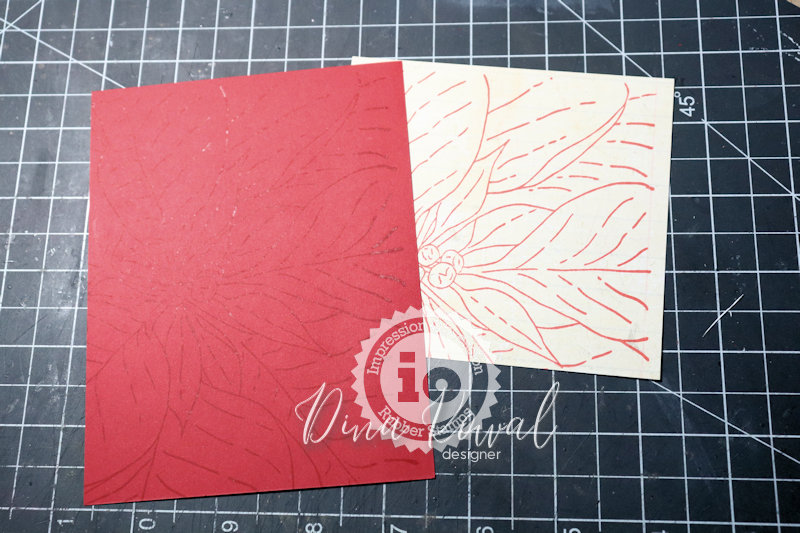
This card design was featured on a recent Splitcoast tutorial, but I didn't get to make a sample since I was traveling. The concept is to stamp 2 panels with a background stamp in the same position, then to cut away one portion of the top panel and line up the second panel in the opening. This is the stamp I used, from my most recent release - I love this one because it can be used in any direction, and cropped so many different ways!


CC361 CAC Poinsettia

For my first card I kept it simple, stamping in a burgundy ink on the darker cardstock and a light tan on the lighter paper. This is a great card design for mass production - so easy to stamp a bunch of panels at once, and then do the trimming and piecing. You could even stack and cut the panels together, then mix and match the pieces (we have a Splitcoast tutorials similar to that idea here).

For the second card I took it up a notch and did a little no-line coloring. 


I stamped both panels in red, then colored a section of the second panel with Copic markers (the reds I used are R22, R24, and R59, if that helps anyone!).


Click on the photo below for a closer look! I added a few little dots on the flower center with a white acrylic pen - this one is my favorite! That sentiment is here - I love this classic font.


Be sure to check out the other designers' blogs for inspiration - see the I.O. blog for all the details
Thanks for stopping by!


Ideas, Supplies, Machines, Paper & More

Wednesday, January 16, 2019

SCS tutorial: Valentine Tea Light

This week's tutorial over on Splitcoast is a sweet little decor item for Valentines Day! That's coming up quickly. I went a slightly different direction with mine, but in the spirit of Valentines Day, the theme is something that many of us love....................


My crafty budget has been limited, so please know that I pounced on this Coffee Brewing die set when it went on sale recently - the individual dies were larger than I expected, too, and I'm really happy to have it in my collection. (The coffee beans are from the Cup and Beans set that came out at the same time.)


I used Artist-Tac adhesive to tuck the die cuts back into their openings, and though that does show through the vellum on the other side, it works like a charm for sticking those detailed pieces in place.


I hope you're having a great week! I'm starting up with pet portraits this week, and I've got a big stack of products to review. Never boring here! :) What are you up to?
Thanks for stopping by!


Ideas, Supplies, Machines, Paper & More

Thursday, July 26, 2018

Impression Obsession DT Challenge: Christmas in July

The Impression Obsession team's challenge today is to create a Christmas project!


I'm bending the challenge just a little bit to share a couple of winter silhouette cards - they could be great Christmas cards too! My first card has a stenciled background that was done with two layers of brushed ink, flipping the stencil once (you can find the stencil HERE). I added some snow dots with white gesso, applied with a ball stylus.


For the snow I used a curved hill die set that makes great scenes as well as card edges - that's linked below.


I stamped the Skater Silhouette over a gel printed panel, then embossed it with a snowflake folder and sanded lightly to give the scene some depth. Love that effect!


Stamps I used: Sled Silhouette, My Heart is Warm,  Skating Silhouette, Layered Bow clear set, Hill Landscape Layers die set

Be sure to check out these other designers' blogs for inspiration -

Anna @ Sassy & Sweet Notes
Daniela @ For the First Time
Giovana @ Believe
Ilina @ Creativity Within
Jeanne @ Inky Paws
Jenny @ One Krafty Kat 
Karen @ Paper Lilies and Ink 
Kelli @ Stamping with a Dream 
Kittie @ Kittie Kraft
Laura @ Laura's Stamp Art Journal
Vicki @ Summerthyme Studio


Remember you can enter these challenges too, using your Impression Obsession stamps! See the I.O. blog for all the details - you might even win a $25 gift certificate!! We'd love to have you join us.
Thanks for stopping by!

Wednesday, July 25, 2018

Splitcoast Tutorial: Center Step Gift Card

This week's tutorial over on Splitcoast is a Center Step Gift Card - this is a fun and easy A2 size card with a little gift pocket inside!


The card base is simple to make, with 2 cut lines and a few scores... but it's impressive on display!


The stamps I used here are from Whimsy Stamps - this is their new Soul Mutts clear set... there are two adorable images in the set, along with lots of sweet sentiments, spots, and paw prints.


Here's a closer look at the main panel - I watercolored the image then added a few shadows with a dark brown colored pencil... one of my favorite ways to add a vintage tone to a colored image.


Here's the inside of the card - there's a little pocket ready for a gift card (the perfect gift, in my opinion!).

Hope you are having a good week!
Thanks for stopping by!