Showing posts with label oil-based pencils. Show all posts

Monday, June 12, 2023

Spellbinders - House Mouse stamps!

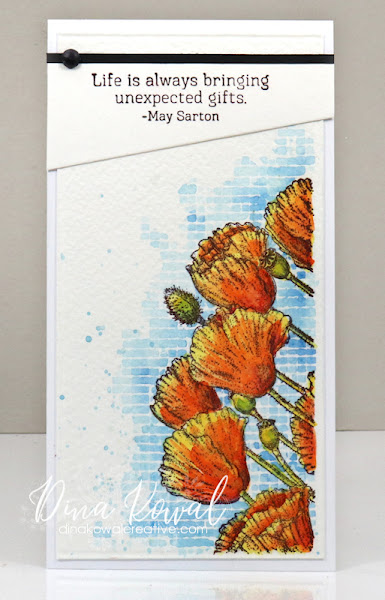
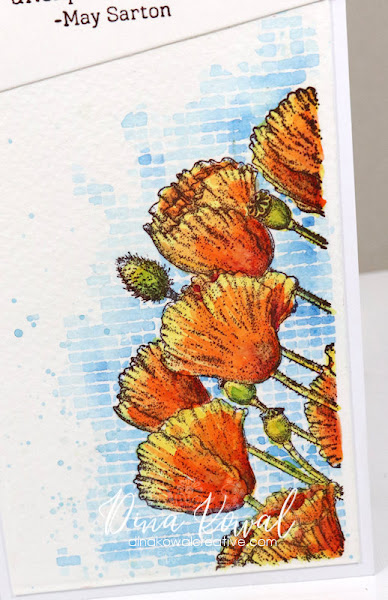
Just a quick post to share in case you didn't know - Spellbinders is the new home of House Mouse stamps! I have a large collection of vintage wood block HM stamps but I love the artwork on the cling stamps too... these are high quality red rubber stamps on indexed cling foam backing and they are just delightful! This set is called Popping By, and it's a nice card-sized image of little airborne Amanda with 2 sentiments to match. I used colored pencils to color this image up while I was listening in on an extended family phone call, and I added some stenciled clouds in the background. I didn't cut my stamp apart, but it's easy to stamp either section alone - I inked up just the flowers and stamped them up the side of my mini slimline panel here - I thought they looked like they were reaching up to the sunshine that way, and it made me happy. I'll just mention too - I was not a fan of how Stampendous used vinyl on their cling stamps, so if you're like me you'll be happy to know these stamps are not mounted on vinyl. It's cling foam with the index printed on the back for easy placement. This panel is watercolored, and I used my drywall tape trick to paint the background.If you're a fan of House Mouse stamps, be sure to check out the new release and other HM sets! These are a nice large format, and I'll be adding a couple more designs to my cart soon! I've enjoyed these little guys since I was a little girl, and it's been fun to follow the license to so many different companies!
(I added my card to the House Mouse and Friends Monday Challenge for challenge #392 - so happy to see those still going on! Once upon a time I did some blog designing for them and they are still using a couple of my graphics. Fun.)

Thanks for stopping by!

When you shop through the affiliate links used here, the company sends a small commission my way at no cost to you as thanks for the referral.
It's a lovely way to partner with these companies that mean so much to our creative community. Everybody wins!


Ideas, Supplies, Machines, Paper & More

Friday, November 11, 2022

Fall | Winter Coffee Lovers Blog Hop - super sponsor!

It's time for the Coffee Lovers Blog Hop, and I'm honored to be a Super Sponsor again! It's been a little while! Keep reading to find out how you can win one of two $10 gift certificates or a handmade coffee-themed zipper pouch, and receive a special coupon code for my online store!


In case you're new to my blog, I'll tell you a little about me.  I adore Winnie the Pooh, randomly burst into song, and collect fun socks. I'm a working artist (see my commissioned pet portraits HERE), have my own line of stamps, papers and stencils, and I'm the Artist in Residence at Splitcoaststampers, among other roles behind the scenes. I have an online store where you'll find prints of my original artwork as well as notecards and jewelry and other items. I've been blogging here for 16 years and I'm a serial creator!


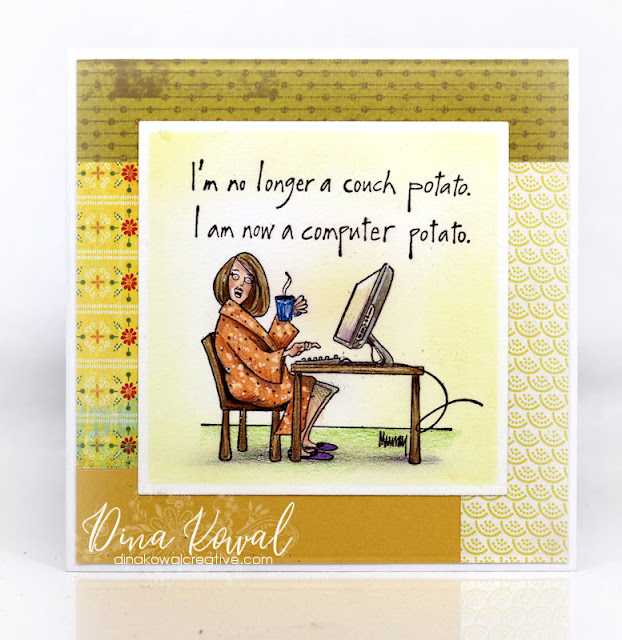
I collect vintage wood art stamps, and this one from American Art Stamp came up at the top of my "coffee" category. They had a cute line of humorous stamps. I had fun coloring this little lady up! I used some coordinating scraps to block out the background - finding I like that style in everything I make lately.


This week, be sure to check out my store for coffee themed items and more - prints and necklaces make great gifts! I've got glue pins and craft and coffee themed purse charms as well (contact me about custom designs too!). Clicking the graphic below will add a 20% coupon to your cart when you spend $20 or more. Thank you!


use code COFFEE20 for your discount!

My prize this week is a handmade zipper pouch in a coffee theme! This is the fabric - isn't it fun?! I enjoy using reclaimed fabrics in my projects, and true to form - this is a set of curtain panels. 


Here is the bag! I love the inside fabric that pulls all the colors together - that was also a valance in a former life. 


I hope you enjoy hopping and creating this week!

Thanks for stopping by!

When you shop through the affiliate links used here, the company sends a small commission my way at no cost to you as thanks for the referral.
It's a lovely way to partner with these companies that mean so much to our creative community. Everybody wins!


Ideas, Supplies, Machines, Paper & More

Monday, June 14, 2021

Sugar Pea Designs - Let's Stay Home

Happy Monday! If you know me at all, you know that I'm a shameless introvert, so the Let's Stay Home set from SugarPea Designs spoke to my very soul. There are sooooo many ways to combine the images into sweet and homey scenes! 

I decided to do some no-line coloring, so I started by building my scene, stamping the images with a pale grey hybrid ink. Since I'd be using colored pencils, I didn't bother to mask the images - the ink is pale enough that the overlapped lines don't show. (If you plan to use a wet medium like watercolors or inks, the lines of this type of ink will show through, so masking or selective inking would be necessary.) 


Here's my scene all stamped - I did reverse the chair image, so here's what that looked like! To reverse the image I needed to stamp it onto another stamp first, so below you can see my setup. I backed the chair stamp with a piece of acetate so I could remove it and put it back into the same position. I inked up the chair and stamped it to the back side of another stamp so it was on a solid base. (I used the book stamp, which you can see on the door of my MISTI below.) After inking and pressing the stamps together, I removed the chair stamp, and put in the foam sheet and my card panel. I pressed the inked back of the book stamp to the panel, and voila! The image was reversed. 

There was a bit of layering involved in the pencil coloring - I didn't document that process but these are the pencils that I used. Following my color wheel again, I used a color triad (3 colors, equidistant on the wheel) of yellow-orange, red-violet, and blue-green. I added in a few horizontal lines with a mechanical pencil (baseboards and molding), and then drew in the ceiling lines using a ruler.


Here are some details from the scene - they're quite a bit larger here than they are on the actual card, so be kind! They were very fun to color, and as you can imagine, my pencils had to be very sharp to get all those details in!


That's all I know today - I'd love to know what you think!

Thanks for stopping by!


Ideas, Supplies, Machines, Paper & More

Sunday, December 13, 2020

Spellbinders December Large Die Kit - Center Stage!

I'm a little late posting this month's Spellbinders club kits so I'm here with a showstopper, quite literally! The stage curtains are part of this month's Large Die kit - there are even some pieces to create a mechanism that lets the curtains open and close! These are great for stage curtains or window curtains - the dies have beautiful details for embossing as well.

The character stamp I used is a vintage image from All Night Media, and the artist is Janet Cleland - her little characters are just delightful. I've got 3 so far, with plans to collect more (check ebay for availability - they are a little hard to find!). I followed the tutorial HERE for building a stage scene - that's one of my tutorials  and it was a lot of fun to create. I used colored pencils for the base coloring and hybrid inks for the shading - I found it interesting that the hybrid inks essentially blended all my wood grain coloring together - that might be a fun property to explore for another tutorial another day!


The cardstock I used for the curtains has sort of a crepe-y finish so I didn't emboss the curtain details beyond what happened when I cut them, but they'd be beautiful with that extra pass through the machine on a smooth or linen cardstock. I pulled a white Stazon Pigment pad over each piece to highlight the texture of the paper.

Here is the full die set - you can see that I just cut the long curtain once and was able to cut it in half for my scene here. The top curtain would be a cute border by itself. The draped portions can be used for buntings as well. Lots of possibilities, as usual!

This will be my last month sharing posts with the club kits - it has been a joy but it's time to pass my spot to someone else so I can focus on other things. I'll still be working with Spellbinders releases from time to time, and I look forward to seeing what they have in store! 

Here are the club details, in case you'd like to join! There are so many clubs and combinations to choose from.


leaf-icon.png Past Club Kits at Member Rates
leaf-icon.png 10% Store Savings
leaf-icon.png Members Only Offers & Deals
leaf-icon.png Earn Creative Rewards for Each Purchase
leaf-icon.png Monthly Inspiration
leaf-icon.png Cancel Anytime
leaf-icon.png Skip Any Month
leaf-icon.png Annual Membership Gift
leaf-icon.png Exclusive Deals 

Thanks for stopping by!


Ideas, Supplies, Machines, Paper & More

Thursday, November 12, 2020

Impression Obsession DT Challenge: Give Thanks

The Impression Obsession team's challenge today is to create a project featuring a message of thanks. 
I pulled out a couple of stamps from my 2019 fall/winter collection - I had requests for Christmas stamps that weren't especially wintry, so there are several focal stamps featuring shells. This border can really be used any time of year! There's also a shell wreath, a shell tree, and a branch of shell ornaments

I started by brushing a little ink on the background (just the ink that was left in my brown brush), then stenciling and also embossing with the Falling Snow stencil from A Colorful Life Designs. The border design is colored with colored pencils, and then dotted with a white Posca paint pen.
I love this sentiment and this scrawly font. Here are links to the stamps I used: 

J13831 Holiday Shell Border
E13828 Give Thanks

Be sure to check out the other designers' blogs for inspiration, and remember you can enter these challenges too, using your Impression Obsession stamps! See the I.O. blog for all the details - you might even win a $25 gift certificate!! We'd love to have you join us.

Thanks for stopping by!


Ideas, Supplies, Machines, Paper & More

Friday, October 23, 2020

Spellbinder new arrival - Buzzworthy collection!

It's always fun to explore the possibilities of a stamp set! You might have seen some other designers playing with the new Buzzworthy collection from Spellbinders - this is a bee and garden themed collection of stamps and a fun honeycomb stencil! 

The Sweet as Honey stamp set is full of lots of small stamp elements, so I thought a wreath concept would be fun...
To create the wreath, I used the corner of my MISTI, positioning the stamps for each ring of the design, and then rotating the panel in the same corner to repeat the stamping 4 times. 


I used colored pencils to color the panel, brushed a little light ink over the background, then centered one of the small sentiments from the set on a popped up die cut.
For a second card, I stamped the peony image on my panel, then stamped a second image on a clear label sheet. I have the Avery sheets which have a frosted coating on them - a little rubbing alcohol removed that nicely. Contact paper would work as well - even packing tape for a smaller image. I cut the image out from the clear sheet, and laid that peony over my first one as a permanent mask.

For the stenciling and stamping around the image, I just needed to make sure I used water-based ink. I kept a paper towel handy to wipe the excess ink away from the mask, and it kept my peony perfectly white! I'll have to tuck this idea away for a future tutorial, I think!
You can see the shine on the label sheet here... The stamp set is below - it's a beautiful cling set with indexing on the back of each image! I love that about the FSJ sets.

Sweet As Honey cling set

Here's the stencil - a nice fit with this set as well, and so many ways it can be used.
Sweet Honeycomb stencil

Remember that through Oct. 25 all clearance items are an additional 15% off - they have added everything from jewelry to dies, stamps and paper, a gel press, and even machines in there, so go grab a good deal this week!

Hope you're having a good week - I'm feeling quite a bit like myself again (5 weeks post surgery), and trying to find balance in a new normal yet again!

Thanks for stopping by!


Ideas, Supplies, Machines, Paper & More