


New Spellbinders Christmas Kit - Merry Everything!
I have something a little different to share today... my friends at Spellbinders sent me their brand new Merry Everything Christmas Kit to play with! I haven't typically been drawn to kits, but I had a lot of fun with this one, and even used kit elements that aren't in my usual wheelhouse! This kit is huuuuge:

In the kit you'll find 25 textured card blanks with envelopes, adhesive, an adorable die set, printed die cuts, a stamp set, a paper pad, cardstock and specialty papers, printed memory cards in 2 sizes (double sided), twine, stickers, rhinestone embellishments, and tags! Plenty to play with, and in so many combinations - there are over 630 pieces in the kit!

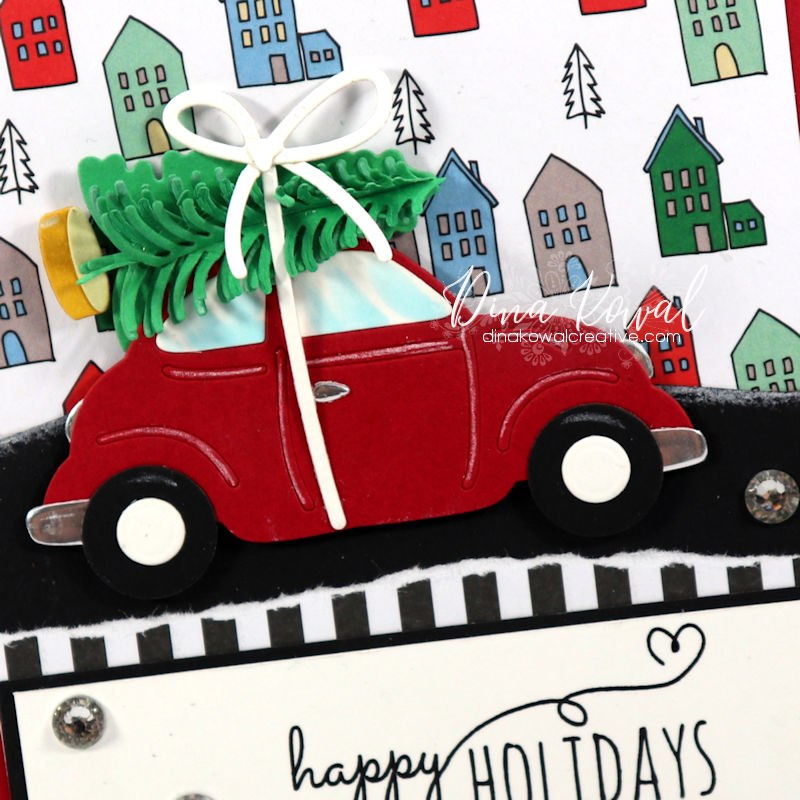
Not long ago I bought an entire Spellbinders kit just for the die set, and by coincidence it was a car set then, too. I love this little beetle too, so I worked with it first! The house background here is one of the memory cards, and the striped paper came from the paper pad. The tree is pretty dimensional, with 4 layered cuts. Pro tip: to make the center cuts stand up, I cut the die cut piece in half, ran a line of Crystal Lacquer down the center of the tree, and stood each little piece up in the glue until they stood on their own.
My second project was this simple tag banner - I sponged the edges of the white tags with brown ink for a distressed look, added some epoxy letters, embellished the top of each tag with die cut shapes, and punched and cut pieces from another tag. It will be a cute piece for a shelf - or maybe a dorm room decoration!

I don't usually work with printed die cut shapes, so I pushed myself to do a couple more projects using them just for a fun challenge!

I truly thought I was following a Splitcoast tutorial when I was working on this but I can't find anything with the same fold, so I guess I'll add this to my list! I used 2 of the card bases from the kit and added score lines 2-1/8" from each end. I cut one card down for the front panel.

Before I glued the panels together, I cut 2 inner pop-up pieces for the center section so I could add more die cuts to the scene.

After those were in place, I glued the front panel just at the sides, then added more die cuts and another hill to the front. Here's a different view so you can see the trees on those inner panels. (To keep from squishing any pieces, the sides fold back for mailing.)

One more little tip - I wanted just a tiny bit of dimension on the panel, so I added some little stenciled snowflakes with modeling paste, and I used the hole from one of the tags as a little stencil.

One last project - I used the Santa and gift die cuts for a Pop-Up Box Card! I used a full sheet of cardstock for the card base, so this is a bit larger than A2 - the finished size closed is 5" x 6".

These are so fun to make, and you can add embellishments to the front and back of each inside piece for a really full card! Pro tip: to add the acetate banners to the card, use super glue gel! Some glues will slide on the plastic, but those aren't going anywhere.

Here's the card folded up! For the best surprise on the receiving end, make sure all your embellishments tuck in and are unseen when the card is closed.

I hope you enjoyed your kit tour! I had fun - and and I still have tons of product to work with! Just a note - this kit is not a regular monthly kit - it's available while supplies last, and you don't have to join a club to purchase. The contents are a $115 value - click HERE to find the cost of the kit to you!


No comments:
Post a Comment