Splitcoast Tutorial: 3D Frame Display
This week's tutorial over on Splitcoast is a 3D Frame Display - be sure to check the gallery for lots of different ideas!
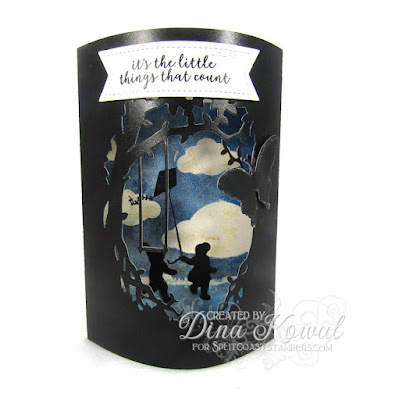
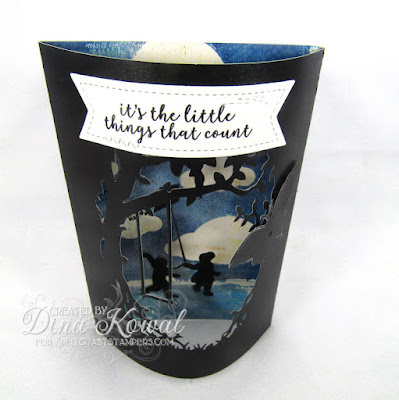
The card front is 2" wider than the base, and scored 1/2" in from each side to create a tab that folds around to the back. The extra inch creates a curve on the front, and it stands by itself. Fun design! I love the negative cut design on this one. These will need to be hand-delivered or mailed in a box, just so you know.
For my second card I pulled out the May 2018 Hero Arts kit - these monthly kits are packed fulllll of stamps and dies, and they're such a great value. I love that you can purchase any kit without subscribing - there have been a couple of times I couldn't help myself! I actually have an alarm set to check the kit each month on the release day (first Monday of the month), just in case. You can find the newest My Monthly Hero kit HERE.
The tree frame die is from the kit. I had the gel printed background in my file - the clouds are die cuts from Impression Obsession that I laid onto the press after covering it with paint. The figures inside are die cut, and the kite is stamped. The butterfly is another IO die, and the banner die is HERE.
These are fun and easy cards to make, and they can be made in any size - just determine your base size, and make the top piece 2" wider!
Hope your week is going well!


This is SO CREATIVE, Dina! LOVE that it is like a Bendi Card! ;) AND the little window scene! ;) A SUPER JOB with your cards! EACH is TOTALLY FUN!!! ;)
ReplyDeleteI love your choices for the 3-D Frame display. Thanks for sharing your ideas from SplitCoastStampers. Brenda West
ReplyDelete