Inchie Arts - Art Square House!
A project I saw on Facebook yesterday got me wondering if I could make a little house out of Art Squares from Inchie Arts, so... I did that! My first thought was to make a gingerbread house with the kraft colored squares, but it didn't quite work out, so I made a snowy one instead.
The front and back of the house are 3" Art Squares... I used the diagonal guide on my quilter's mat to position them for cutting. I cut down at the 1" vertical marks, then cut the bottom off so the sides would be 2" high. The sides and roof pieces are 2" squares.
I wanted the pieces to have some texture, so I ran the front, back and sides through my Big Shot with this striped embossing folder, and the roof pieces with a brick patterned folder. (Side note: if you love a good deal on embossing folders, get on Consumer Crafts' mailing list! These were $1.49 apiece, even the large sizes!)
Instead of adhering die cuts, I ran the front and back pieces through the Big Shot with the dies to deboss the outline... I always forget to layer tissue paper over the pieces so all the grooves in my plates don't print as well... if you make one, remember that! These dies are from Impression Obsession (Door and Window set).
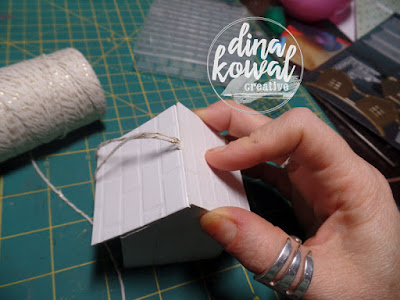
To assemble the house, I glued the sides to the outside of the end pieces. I used Tombow Mono Multi glue, which dries really quickly and is very sticky too!
The roof pieces sit right across the angled sides. For the hanger I knotted some twine and tucked the knot in past the edge of the first roof piece, then sealed it in with the second one.
I needed some snow on the roof so I pulled out the Aleene's Glitter Snow - this is amazing dimensional paste with glitter already mixed in. I spread a little on each side with a palette knife.
I added one more 2" square to the base of the house for support.
I decorated the front and back using an icicle die (Impression Obsession Snowy Roof set). I didn't have a tiny wreath die so I had to improvise with a Sizzix flower center (from a set that came with my Big Shot Plus), and a teeny bow from a retired Simon Says Stamp set (Thanks for the Support).
This was so much fun to make - I'm sure I'll revisit this, and I hope you'll try it too!
 |
| Follow Inchie Arts on Facebook for more inspiration! |


Super cute! Great step by step instructions! These would make lovely gift toppers on plates of cookies for the neighbors! Merry Merry!
ReplyDeleteYou're so clever Dina. I think your house is so cute, cute, cute.
ReplyDeleteAdorable! What a fun idea...I am going to share with my craft group. Thx for the great photo directions.
ReplyDeleteSO ADORABLE, DINA! THANK YOU TOO, for the heads up about the on-line store! I will have to look for this little door & window set at IO, too! ;) JUST ADORABLE!!!! ;)
ReplyDeleteVery very clever. Lisa must be thrilled too!
ReplyDeleteHi Dina, I'm going to try making this adorable house! What is the trick with the tissue paper, for embossing?
ReplyDeleteSome people put a sheet of tissue paper between the paper and the top plate so the cuts and grooves on the plate don't imprint onto the top of the cut piece.
Delete