Splitcoast Tutorial: Spinning Princess Card
This week's tutorial over on Splitcoast is called a Spinning Princess Pop-Up - you don't have to use a princess to complete the card, but the concept reminded me of the twirling ballerina jewelry boxes that are a young girl's dream.
This weekend my parents are celebrating their 50th anniversary, and my whole family will be together to celebrate all our milestone anniversaries - my brother and his wife have been married 10 years and we've been married 15. We also finally transferred our wedding video from VHS to DVD this last week - guess that's why I have weddings on my mind! The central die set (Bride & Groom) is from Impression Obsession.
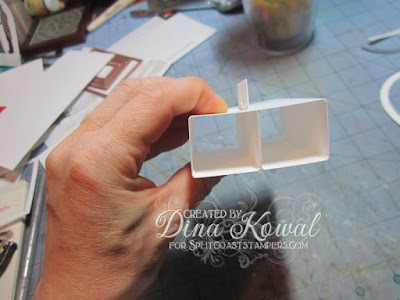
My frame was a little smaller than the one in the tutorial, so I adjusted the base to a smaller size. The top of the base is ATC size (2-1/2" x 3-1/2"). I cut the base to 8-1/2" x 3-1/4", and scored at 1", 2-1/8" and 3-1/8" from both ends. Here's a peek at the base from the side - the ends fold into the middle to give stability to the tab that holds up the frame.
Instead of using a wire and beads for the spinner, I used two decorative head pins. Here's what that looked like during assembly.
I added some loose freehand florals to the base panel for a little extra color. The tiny bouquet was added for stability - all that's holding the groom up is that teeny little strip between them. There are adhesive pearls on either side of the ribbon for more support of the flowers and the die cut.
The flower dies can be found here and the sentiment is here.
Hope you'll try this one!


Congratulations to your parents. My parents will celebrate their 50th next year Lord willing and my in-laws will celebrate their 60th. Love your spinning project. Very creative.
ReplyDeleteWell that is something to celebrate - 50 years!!!! Congratulations to your parents. And congrats to all of you for achieving all of these milestones! Your spinning couple is a darling design!!! Thank you for explaining how you made it Dina ♥
ReplyDeleteI love this!
ReplyDelete