


Splitcoast Tutorial: Layered Autumn Trees
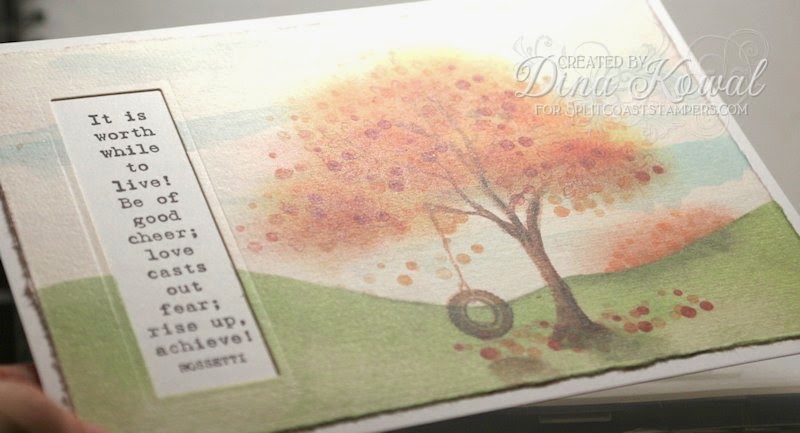
This week's tutorial over on Splitcoast shows a beautiful way to create autumn trees using stamps, sponges, and layers of ink. The samples that Cindy has done are so vibrant - I hope you'll take a peek!
Cindy uses Distress inks for her scenes, but I didn't have the right colors, so I used Versamagic chalk inks on my card. Actually... I didn't have any of the supplies she used, so I just followed her steps with what I had.

The stamps I used are from Impression Obsession - the tree and swing are available in either a cling or clear set. I used a regular round sponge to add my leaf colors, pinching it into a smaller circle, since I don't have daubers. For the dots, I used stamps from my favorite cupcake set - I love that little bit of added whimsy.

I added some shading to the ground and trunk with distress markers, and blended with a waterbrush. For a final touch, I added a fine layer of white pearl PanPastel - I have been playing with those constantly over the last week in preparation for an online class I'm writing. I love that subtle sheen - so pretty.
Hope you're having a great week! Thank you for stopping by - I'll have another Impression Obsession card to share tomorrow, and a tip for die cutting letters - it's my turn for DT Thursday!


It's so soft and delicate. The red circles under the tree look just like apples that fell :-)
ReplyDelete