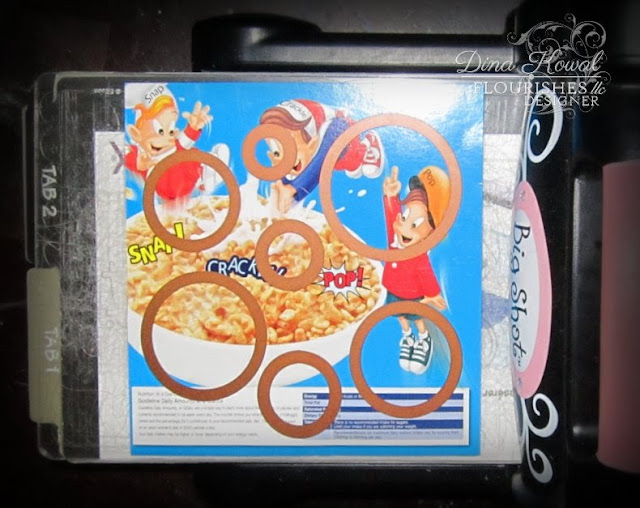
Stencil tutorial video
Wanted to share the stencil video I made for Flourishes in case you missed it last month. In the video below I'll show you several ways to use homemade stencils, like the one I made here, for...
- Spray paints or spray inks
- Layering images and colors by rotating your stencil
- Watercoloring, stamping, and sponging through stencils
- Layering multiple stencils
- Doodling
- Adding dimension, patterns, and texture
If you'd like to make your own stencil, go grab a set of shaped dies and a piece of chipboard! Space the dies evenly on your chipboard piece (I used a panel from a cereal box, and cut it into a 6-inch square). If you have enough to fill the space, you can send it through your die cut machine in one pass. If you need to make several passes to achieve the look you want, that's fine too.
Here is the video, and the samples I made with the pieces you'll see me create!
Stamps used: Tulips for Friends
Stamps used: Old Tea Rose
Stamps used: Beach Life, Seaside Life


Thank you for the fabulous video. Love the ideas and your cards.
ReplyDeleteBrilliant! How inventive of you and I love the spectacular results. Beautiful.
ReplyDeleteoh my what a grogeous outcome, TFS the video
ReplyDeleteWhat beautiful results!
ReplyDeleteDina, do you ever find that stamping thru stencils in a thicker layer like cereal box or chipboard makes it hard to get the stamped image? I can't push hard enough so the image barely shows up. It's a bit easier for me if I use something thinner like a newspaper or copy paper....?
Thank you so much for sharing your talent with us! This was an amazing tutorial.
ReplyDeleteJust found your lovely blog & fab video on stamping with stencils. THANK YOU for sharing it it's been great to watch and learn.
ReplyDelete