Showing posts with label Power Poppy. Show all posts

Monday, March 16, 2020

Spellbinders March Clubs hop!

It's always fun to be a part of a blog hop! Today I'm hopping with some friends of Spellbinders, and we've got all kinds of inspiration to share using this month's Club kits! If you're a regular reader of my blog and just happened upon my section of the hop, you may want to start back at the beginning so you don't miss out on any prizes!  

The Spellbinders Blog is the place to get started - and if you should happen to get lost or interrupted in between, you can always go there for a complete list of links in the correct order. If you came to my blog from Gemma's blog, you are doing just fine.


If you're new to my blog, you should know that I like to think outside the box and come up with alternate uses for stamps and dies, so I'm sharing one of  'those' projects today! This month's Large Die kit is a delightful Easter basket, and the Glimmer kit has some nesting egg dies. I cut off the basket handles to create more of a farmer's market style basket, then cut the egg shapes out of red cardstock - tadaaaaaa - a strawberry basket!


I did a little shading on the basket die to show off the woven texture a little bit - that's a combination of Copic markers and colored pencil. The strawberry seeds are done with an acrylic paint pen, and those leaves were part of the die kit this month. That tag die is from the April 2019 Large Die kit, and I used a sentiment from Power Poppy.


Remember to comment as you hop along today - each comment is a chance to win! Spellbinders will be giving away a $50 gift certificate to 5 lucky blog readers, and you can also earn more chances to win by commenting along the hop! I have a $25 gift certificate to give away, and so does evvvvvvery other designer who's sharing a project today. 

Here are the club details, if you're not a member yet! My favorite perks are the extra sales and the 10% discount on the Spellbinders site!

leaf-icon.png Past Club Kits at Member Rates
leaf-icon.png 10% Store Savings
leaf-icon.png Members Only Offers & Deals
leaf-icon.png Earn Creative Rewards for Each Purchase
leaf-icon.png Monthly Inspiration
leaf-icon.png Cancel Anytime
leaf-icon.png Skip Any Month
leaf-icon.png Annual Membership Gift
leaf-icon.png Exclusive Deals 

Ready to go on? Head over to Virginia Lu's blog next! Thank you for visiting me today!

Thanks for stopping by!


Ideas, Supplies, Machines, Paper & More

Monday, January 30, 2017

Birthday batch!

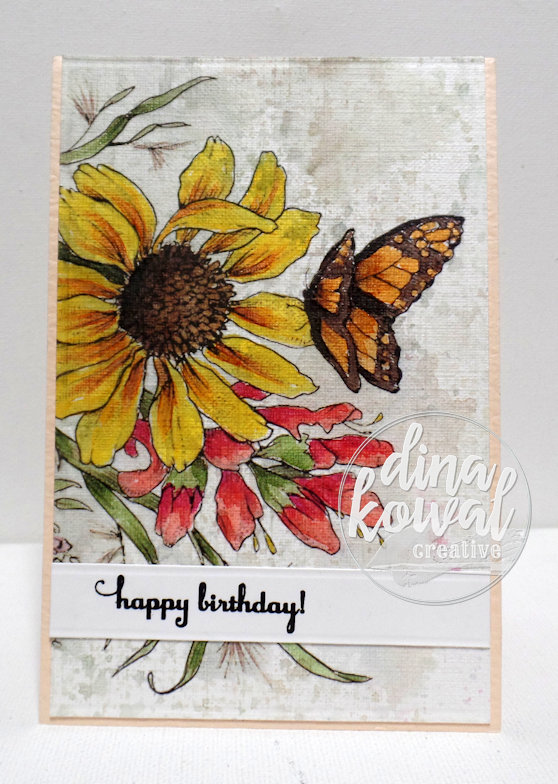
This last week I went to visit my parents, and my mom put an order in for 4 birthday cards. To save time, I printed a Power Poppy image that fit the width of a sheet of Canva-Paper, then flipped the image to print it a second time... I wanted the cards to be similar but unique. Here's the full set...


I colored both images with Copic markers - I'll list the colors below. Since I had a lot of area to cover, it was so nice to use the Canva-Paper - easier to blend color, and less colors were needed to get good gradients and shading. I colored the full sheet at once, then split it into card sized panels.


When the coloring was done, I pulled out my craft sheet and smooshed and spritzed some Distress inks on it, then laid the panels into the ink for a distressed background...


I love that this paper is resilient enough to handle the wetness, and also that the printed ink and Copic ink were unbothered. It added such a nice vintage touch to the image that wasn't there with a plain white background.


I used my MISTI to stamp 4 birthday sentiments, then positioned them where they seemed to 'work' best.


This is a great way to mass produce cards and still come up with unique results! The image I used is HERE - another beauty from Power Poppy that works well in several different orientations, as well as this split image!


These are the Copic colors that I used:


Have a great week - I'll be over here trying to get caught up, doing some research on papers for this new printer, and working on some new things for my store!
Thanks for stopping by!

Wednesday, August 24, 2016

Splitcoast Tutorial: Palette Blending

It's my turn to share a tutorial over on Splitcoast - this week we're talking about Palette Blending! This isn't a new technique, but it was a resource we didn't have, and I thought it was good timing, since the technique works so well with the Zig Clean Color brush markers so many of us are using. The techniques are great for watercoloring with other dye inks as well - it's just a fun and useful skill to know.


Thought I'd link to the paper I'm working with too - I love the Fabriano brand papers, and this is the Studio Hot Press paper - I usually prefer a heavier weight than this 90# but it's working fine... I just have a bit left from a class I taught last year, so I'm trying to use it up. My favorite right now is the Fabriano Artistico 140# Cold Press, but I save that for paintings.


The image I used here is a digital stamp from Power Poppy - I sized it to about 5" high and centered it so that I could split it onto two panels when it was colored. It's called Tulips in Hobnail Pitcher. The sentiments are from my latest release at IO - Where You Need, and It Is Well.

Hope you're having a great week!
Thanks for stopping by!

Monday, April 25, 2016

Power Poppy - Created to Create

I'm hopping with the Power Poppy team today - every once in a while I get a chance to use a new digital stamp set and play along! Even though I don't always get to participate, I simply adore this team, and this company. :)

As soon as I saw this new design, I fell in love, and knew that I wanted to make something that could hang in my studio. Here's my project - the finished frame is a Goodwill rescue, and it's 12" square.


I printed the image on Canva-Paper and colored with Touch Twin Markers, using a waterbrush filled with rubbing alcohol for some of the shading. This is what the frame looked like when I bought it....... .. ha!


I pulled out the glass and mats and stamped a damask pattern around the frame with pigment ink, then embossed with black powder...


Next I covered the frame with acrylic paint...


...and after that was dry, I sanded some of the paint away for a distressed look - revealing some of the embossing, and some of the white underneath.


Here's a closer look at the colored piece - these are my favorite colors and some of my favorite flowers, and I will love looking at this in my studio for a reminder of why I do what I do! Thanks Marcy!


Please visit the Power Poppy blog for a list of who's hopping today, and a peek at the other digital set being released!
Thanks for stopping by!

Tuesday, March 22, 2016

Printed Digi - Epson Sure Color P600

I'm back with another project that began on an Epson SureColor P600 – it handles many different media types, thicknesses and paper sizes, and this piece was printed on watercolor paper. The ink is waterproof, so I had some fun with Brusho, and quite a bit of water. 


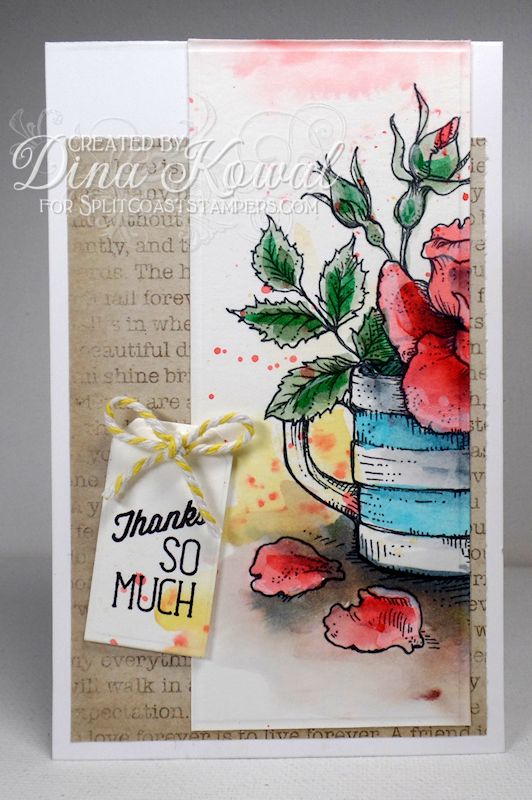
Lori enlarged the Everything's Rosy digital stamp from Power Poppy and printed it twice for me - I used greys and a coral red to color the top image, and a more triadic color set to color the second image. Both images yielded 2 cards each! I love these images in a larger scale.


I wanted to keep the cards cohesive by using a common background paper, so I chose this vintage text background. The small sentiments are from various other Power Poppy sets. I have a bolt of this trim, so I added a few snips in this set.  I used a pretty liberal amount of water on my first application of Brusho, then let that dry and painted in details in deeper shades.


For the more colorful image, I used a grid die to cut one portion into squares. This coloring is done with Brusho and some other mediums (which I should have written down... I don't remember any more what they were! Looks like more activated Brusho and some pencils?)


I thought about making a bookmark out of the leftover portion, but it worked so nicely on this smaller card size, it ended up there. The card above is 5" square, which leaves room for a 3.5" x 5.5" card - that's a great little size for thank you notes, and I always need those!


I hope you'll take a peek at the printer review tomorrow - I'll link it up tomorrow when I tell you about this week's SCS tutorial. :)
Thanks for stopping by!