Wednesday, June 27, 2018

Splitcoast Tutorial: Double Triangle Fold

This week's tutorial over on Splitcoast is a quick and easy fun fold - the Double Triangle Fold. The base is done with 2 scores and a cut, and you can get 2 bases out of a single sheet of cardstock... I did have to use a ruler to measure my cut line rather than cutting with my trimmer - the diagonal is 16".


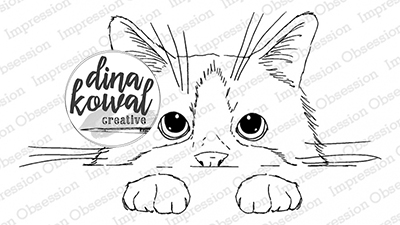
I was sooo excited when I realized my Peeker stamps would work really perfectly with this fold! I will have a video for you next month when my next stamp release comes out... I tried making one of the cat card, but it was kind of a mess. :) 


The paws are adhered to the patterned paper panel of the card - so cute. If you haven't seen this set, the paws are separate stamps, so you can pop them up or wrap them around something.

Peeking Kitty cling set
The sentiment is from this set of minis... on these images the paws are attached, but they're such a cute size!

Mini Peekers clear set
Have fun with this fold - I know you'll see it here again!

Thanks for stopping by!

Splitcoast Product Review: Smooch Accent Ink

The Splitcoast Product Focus team has been playing with Smooch Pearlized Accent Ink this week - this is a fun and versatile product from our friends at Clearsnap! (By the way - if you represent a company and you have a craft product (anything!) that you'd like our team to test and review for the paper crafting community - let me know!)


There are several products in the Smooch line - these pearlized accent inks are designed to add shiny, shimmery accents to your paper projects. They're designed with an applicator in the cap, and that whimsical lid becomes a very effective handle when it's removed from the bottle. 


The applicator is a small pointed spongy nib, not a brush. The tip is great for dots and details, and you can see that it holds quite a bit of product! There are 32 colors in all.


I shared this project a couple of weeks ago - I dotted Moonlight Smooch around the sparklers, and also coated each of the frosting layers with it - I love that the white is transparent enough to see my watercolor shading underneath. Moonlight was my favorite of the colors I was sent!


I wanted to push the product beyond the obvious "accent ink" application, so I tried a few different things - some worked and some didn't. :) I used a marbling technique on the next background - that technique can be found here. I didn't get a very vibrant color on any of my marbled backgrounds - not sure if that's something that would be improved with different papers... anyway, this was my favorite.


I was also able to get a marbled effect by "floating" the inks on my Gelli Plate, so that's something to try too, if you're inspired. I used watercolors to paint the rainbow and unicorn, but also highlighted them with more Smooch to add a little sparkle. (This stamp set is from Butterfly Reflections Ink - it's one of their exclusive collab sets! So cute.)
This card is another combination of techniques - the background is one of my marbling experiments, and the die cut is covered with Moonlight Smooch, with a few gold accents.


Not sure if you can see the shimmer on the die cut here, but it's very fun in person!


Smooch is water-based, so my next experiment was to dilute it on a craft sheet to watercolor with it. The green layer of my background above is a pearlescent wash. When that was dry, I popped the ringed stamp onto my MISTI and applied Smooch directly to the stamp. I misted it and stamped a couple of impressions for a soft, shimmery look.


 I used Smooch to customize this metal charm, and was happy to see the product adhering well to the metal. There's a layer of Colorique Sealant on the charm to keep the color in place.

 Overall, this was a fun product that I'll be using again - come over to the Product Focus page to see more projects and read our team reviews!

Thanks for stopping by!

Thursday, June 21, 2018

Flash Sale!

Impression Obsession is having a FLASH SALE!  Use code SOLSTICE for 20% off your order. Sale ends June 24th at midnight EST.


Thanks for stopping by!

Impression Obsession DT Challenge: I Sea You

The Impression Obsession team's challenge today is to create a project with a nautical theme.


I shared a peek of this card yesterday - this is my sample for this week's tutorial over on Splitcoast - Gel Plate Impressionism! I used Distress Oxide inks for my base colors, and then stamped the sunburst with Colorbox dye ink.


You can see the background a little closer here - the result of the technique is a spotty, impressionistic effect that is a lot of fun for backgrounds as well as scenes.


It took me forever to find this kayak die on my desk...! The waves are a couple of negative cuts from the Sailboat Frame die, which I'll link with the others below.

Stamps and dies I used: CAC Reverse Sunburst, Start ThereKayakers, Sailboat Frame

Be sure to check out these other designers' blogs for inspiration -


Anna @ Sassy & Sweet Notes
Daniela @ For the First Time
Giovana @ Believe
Ilina @ Creativity Within
Jeanne @ Inky Paws
Jenny @ One Krafty Kat 
Karen @ Paper Lilies and Ink 
Kelli @ Stamping with a Dream 
Kittie @ Kittie Kraft
Laura @ Laura's Stamp Art Journal
Vicki @ Summerthyme Studio


And be sure to stop by the site for a FLASH SALE!  Use code SOLSTICE for 20% off your order.


Remember you can enter these challenges too, using your Impression Obsession stamps! See the I.O. blog for all the details - you might even win a $25 gift certificate!! We'd love to have you join us.
Thanks for stopping by!

Wednesday, June 20, 2018

Splitcoast Tutorials: Gel Plate Impressionism

This week's tutorial over on Splitcoast is a really fun gel printing technique called Gel Plate Impressionism! Here's a peek at my card - I'll share more about it tomorrow since it fits the Impression Obsession challenge as well.


If you have a gel plate, I hope you'll try this one - it's really fun!
Thanks for stopping by!

Friday, June 15, 2018

Overstock sale!

If you're like me and you wait for sales and discount codes, you'll want to check out Ellen Hutson's "Our Oops" section this weekend - with coupon code YAY you can save 30% on a whole bunch of overstocked items - I spotted a couple of my designs in there as well! Lots of fun things to choose from.

Go peek! Sale ends June 19th, 2018 at 11:59PM PDT.


Thanks for stopping by!

Wednesday, June 13, 2018

Splitcoast Tutorial: Black Ice Technique

This week's tutorial over on Splitcoast is the Black Ice Technique, developed by Melissa Kerman! Melissa's tutorials are always well planned and so unique - I hope you'll take a peek! I pulled out 2 of my butterfly designs - I've been seeing more and more butterflies in my yard, and the milkweed is blooming - beauty everywhere.


I made 2 cards using her technique, but my base is a shimmery silver cardstock rather than a foil, and my results aren't as striking as hers - I may need to revisit the technique with some shinier cardstock - I think the clear embossing would show up better.


At an angle you can see the clear effects a little better, maybe...? I love these 2 stamps so much - I will link them below.


Here's my second sample, and you can see a little of the 'ice' effect on the butterfly in the photo below.


Stamps I used: Big Butterfly, What If, Grunge Butterfly, Courage Dear Heart

Thanks for stopping in!
Thanks for stopping by!

Saturday, June 09, 2018

Selective Stamping - quick and easy!

Just a quick post today - a few weeks ago I promised a video on how to make this clean and simple silhouette card, and it's done!


I used a couple of simple techniques for selective stamping, or stamping just part of an image at a time. Hope you enjoy!


The Flag Girl Silhouette stamp can be found HERE.

The Celebrating You stamp can be found HERE.

Have a great weekend!

Thanks for stopping by!

Thursday, June 07, 2018

Impression Obsession DT Challenge: Foodie Fun

The Impression Obsession team's challenge today is to create a project featuring something edible.


I love this clear set from Alesa Baker - it has some sweet sentiments and so many possibilities, from sparklers to florals and even a cute hangy banner! I stamped and embossed the cake, sparklers, and 4 sparkles with white powder, then watercolored with QoR paints. 


For a little extra shine, I embossed a few more sparkles with clear powder, and added some dots around them with ColorBox Smooch


I used more Smooch over the frosting on the cake too, and I love that added shine... my watercoloring shows through it, too, which I wasn't expecting. Looking forward to playing with that product a little more in the next couple of weeks!
Stamps I used: Sweet Celebrations clear set, Find Every Reason


Be sure to check out these other designers' blogs for inspiration -

Anna @ Sassy & Sweet Notes
Daniela @ For the First Time
Giovana @ Believe
Ilina @ Creativity Within
Jeanne @ Inky Paws
Jenny @ One Krafty Kat 
Karen @ Paper Lilies and Ink 
Kelli @ Stamping with a Dream 
Kittie @ Kittie Kraft
Laura @ Laura's Stamp Art Journal
Vicki @ Summerthyme Studio


Remember you can enter these challenges too, using your Impression Obsession stamps! See the I.O. blog for all the details - you might even win a $25 gift certificate!! We'd love to have you join us.
Thanks for stopping by!

Wednesday, June 06, 2018

Splitcoast tutorial: Coffee Painting

This week's tutorial over on Splitcoast is Coffee Painting!


This was a fun technique to pick up again - I've done it before (HERE) with instant coffee, but I didn't have that on hand, so I tried my luck with the decaf in the pantry. The color isn't as rich as I would have liked, but maybe once my palette 'cures' a little longer I'll have a little more control of the depth of color.


This Printworks stamp has been sitting by my desk unused since the big Hobby Lobby sale - how long ago was that? Sentiment is from my stamp line at Impression Obsession (HERE).

It's been an exhausting week so far, and on top of it all, I discovered a couple of my stamp sets that have been stolen and are being sold from China through AliExpress... I'm trying to stay positive and keep perspective - I know many companies are seeing FAR more of their designs being used without permission, and 2 sets out of nearly 800 of my own designs is quite a small percentage.  Please support original artists and designers and earnest American companies and not dishonest thieves of intellectual property - that's really half the battle... and if you see sets you recognize being sold "unbranded" or by someone other than the company or a trusted retailer, please let the company or designer know.

I need a nap! 
Thanks for stopping by!