Friday, August 31, 2012

Hope Happens


 After my post the other day with the 'scary' white space, I found it a little ironic that this card was born...! I felt like playing a challenge earlier this week, and looked over at the Timeless Tuesday challenge over at the Flourishes Blog... butterflies or insects. Nothing in my Flourishes stash with wings at all, so I pulled out these Spellbinders dies instead, and created some negative-space windows.


On the card base (the panel that shows through) I stamped some images from the Lenten Roses set and colored them in with Inktense pencils.


Love this sentiment from the Magnolia set too - I think it will be getting lots of use in October during the Hope You Can Cling To card drive at Splitcoaststampers!

Stay tuned Monday for a new Flourishes Beautiful World Tour hop!
Thanks for stopping by!

Wednesday, August 29, 2012

Stamping with Jill - So Blessed

Jill and I are working with the So Blessed cling set today... I can't believe our little same-stamp series is over - this has been such a blast for me! I hope you have enjoyed it too - we are thinking we may just have to make a more regular 'thing' of it.... what do you think?


Well, you've been around long enough to know that I'm a big fan of "no-line" coloring - silhouette images are fun to do in the same way! I stamped the image with Memento Angel Pink ink and colored with Touch Twin Markers. The colors I used are below.

When I was done coloring, I masked the image, and stamped the flourish from the Flowers Sweet set around the background and sponged with the same Angel Pink ink. I layered several Spellbinders die cuts to create my frame - the bottommost label was cut in half first, and I separated the halves so that both sides would show around the oval label. (Does that make sense?) Love that bright pink, and the sort of mod look she ended up with! Hope this gives you some more ideas for using those silhouette images.


Make sure to check out Jill's post for the day, and leave her some love - she is amazing!!

Thanks for stopping by!

Tuesday, August 28, 2012

Heartfelt Creations Alumni Hop


It's time again for the Heartfelt Creations Design Team Alumni monthly blog hop... We've chosen the last Tuesday of each month to share a project featuring Heartfelt Creations' stamps when we can, just for fun.  If you'd like a chance at winning a prize, be sure to leave a comment on every blog along the hop by Friday - there is a $25 gift certificate up for grabs for one random commenter!

Just a few of us are participating this month:

Dina @ mamadinis.blogspot.com ---------------------you're here!


I dug around and found this favorite image (Maxwell House) from Heartfelt Creations already colored up - it's been stashed for quite a while (the oval was cut with my Coluzzle, if that's any indication!!), but I think I used acrylic paints to color in the scene. I love this image because so many of my plants out front are potted in unlikely containers (an old diaper pail, a mouse trap, a cooking pot, tin cans, old breadmaker pan...). I have a Pinterest board dedicated to repurposed items used in decorating, too.

Here's a closer look at some detail that's hidden by the bow...

Hope you enjoy the hop today!

Thanks for stopping by!

Monday, August 27, 2012

TTC24 - Inspiration Challenge

There's a new challenge up at the Touch Twin Markers & More Challenge blog - this time we're using our markers to create projects based on the inspiration picture below. We hope you'll join the fun!

I made this card for Dare To Get Dirty last month - I managed to fulfill 6 challenges with it, which was pretty cool! Of course I was thinking ahead to the colors in the inspiration picture here, and chose to take inspiration from the black and white photo on the wall, and the pop of pink on the daybed.


You can visit the Touch Twin Markers & More Challenge blog for all the details if you'd like to play! Don't have a blog? That's OK. Just post to any online gallery with the keywords TTC24 and touchtwin. Have fun!

Thanks for stopping by!

Sunday, August 26, 2012

Inktense Pencils

One of our members on Splitcoaststampers had a question about Derwent Inktense pencils, so I put together a short video of how I use them - it's not anything special (basically just me coloring quickly and talking to myself) but if you've been curious about these unique pencils, this might answer some questions for you. Enjoy, and please let me know if you have questions!


Thanks for stopping by!

Saturday, August 25, 2012

Just because........

Have to share one more card with the Tiny Wishes set from Penny Black - this was the card I had originally made for yesterday's post with Jill, but I switched it out at the last minute because all the white space was bothering me! Jill encouraged me to share it, so here it is! I will get over my fear of white space one day!!


I did some paper piecing and paper tole on the hedgehog image to add dimension. The coloring is done with Ranger reinkers and a water brush. Jill used this same stamp yesterday, and it's fun to see our different styles together! You can click HERE to see her post, in case you missed it.

Here's a different angle so you can see the dimension on the clothes and arm. I love adding little details!


Hope you have a great weekend!
Thanks for stopping by!

Friday, August 24, 2012

Stamping with Jill - Tiny Wishes


Jill and I are at it again today - are you enjoying these posts? I just love the fact that one stamp set can invite so many possibilities... and it's always so fun to see where those possibilities take us individually! We are working with the Tiny Wishes clear set from Penny Black today:

I colored the mouse image using Polychromos pencils - I wanted to keep my card soft and not add too many patterns to the background, so I used a Spellbinders die to emboss a border on my card base (scary for me... I'm always afraid the die will cut through - didn't though!).

The banner die is from Quickutz; I added some simple pencil shading in a very light grey to give it more definition. The sentiment is from Sweet 'n Sassy Stamps. I used the outer edge of a paper doily to edge my oval diecut.

Remember you can click on any picture for a closer look!

I hope you'll take a peek over at Jill's blog to see what she's created with this cutie set today! Thanks for visiting me..............!!

Wednesday, August 22, 2012

Tape Roll Keepsake Box

I wanted to share a project I made a couple of weeks ago as a birthday present for my sweet co-worker! I have been hoarding wide tape rolls for some time until I had a chance to make one of these. I will share a tutorial soon!


Hard to believe I started with this........!!

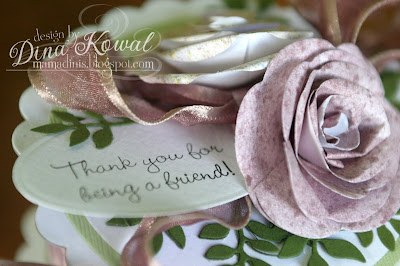
Details......... the roses were made with Spellbinders diecuts and the branches underneath are actually a Quickutz tree die that came in a family history set. The tag is a retired Spellbinders die and the sentiment is from Impression Obsession - I got it in a clear set called Three of a Kind, or it is available in rubber HERE.


The one thing I need to 'fix' when I do the tutorial - I didn't leave enough give on the ribbon hinge, so this one doesn't open all the way. Whoops!

I tucked this necklace inside - the image is from Penny Black, and was colored with Touch Twin Markers.
I'll be back Friday with another joint post with Jill!!
Thanks for stopping by!